When a modern high-efficiency Whirlpool or Maytag top-load washing machine stops mid-cycle, refuses to spin, or flashes confusing status lights, the machine’s central electronic control board has logged a specific diagnostic fault code. Because modern HE washers lack alphanumeric digital displays, many owners mistakenly assume the control board has failed completely.
In reality, factory technicians do not guess. By entering the official Service Diagnostic Mode using the cycle selector dial or the 3-button keypad sequence, you can force the machine to display its stored fault history in binary format and run an Automatic Recalibration Cycle.
Method 1: The Rotary Dial Sequence (6-Turn Code)
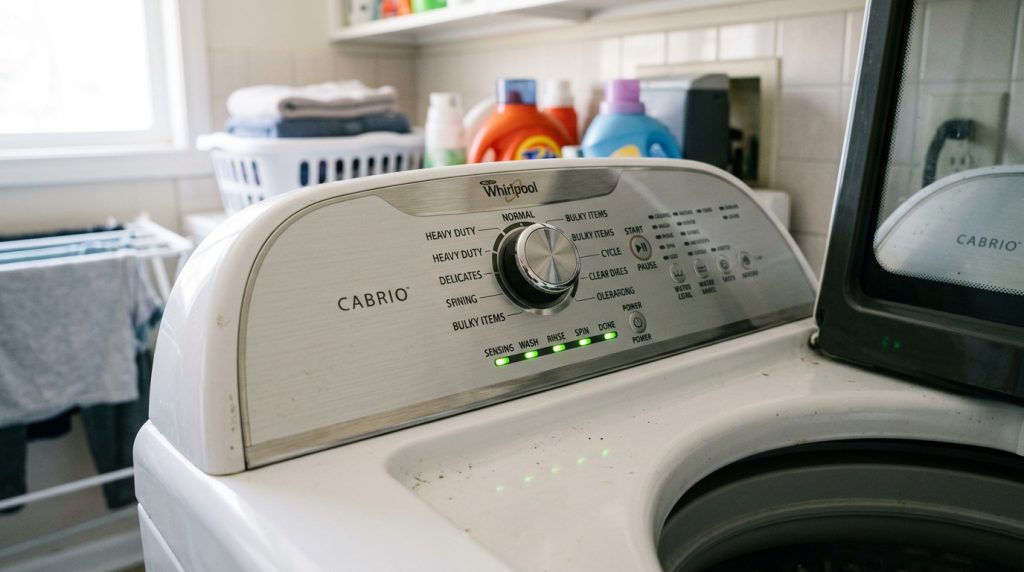
This procedure applies to all Whirlpool Cabrio, Maytag Bravos, Maytag Commercial Technology (MCT), Centennial, Roper, and Amana top-load washers equipped with a central rotary cycle knob.
Place the Washer in Standby Mode
Ensure the washing machine is plugged into a functioning grounded 120V outlet. All console status lights must be completely dark. The cycle selector dial must be pointing straight up at 12 o’clock (Normal cycle position). The lid must be fully closed.
Execute the 6-Turn Rotary Sequence (Within 6 Seconds)
Turn the cycle selector dial methodically through the following clicks. The entire sequence must be completed within 6 seconds:
- Click 1: Turn the dial 1 click LEFT (Counter-Clockwise).
- Click 2: Turn the dial 1 click RIGHT (Clockwise).
- Click 3: Turn the dial 1 click RIGHT (Clockwise).
- Click 4: Turn the dial 1 click RIGHT (Clockwise).
- Click 5: Turn the dial 1 click LEFT (Counter-Clockwise).
- Click 6: Turn the dial 1 click RIGHT (Clockwise).
Verify Console Illumination
If executed correctly, all status indicator LEDs (Sensing, Wash, Rinse, Spin, Done) will flash simultaneously on and off at 1/2-second intervals. The machine is now in Diagnostic Mode.
Technician Tip: If the lights do not illuminate, you turned the knob too fast or too slow. Wait 15 seconds in Standby mode and repeat the sequence.
How to Read Binary LED Error Codes (The Light Formula)
Once in diagnostic mode, turn the cycle dial 1 click clockwise until only the Done light is illuminated, then press START. The console will now display stored fault codes using a 2-stage alternating binary flash sequence.
| Console LED | Binary Weight | Fault Phase (F) | Error Phase (E) |
|---|---|---|---|
| Sensing | 8 (F indicator) | ON (Signifies Fault Phase) | OFF (Signifies Error Phase) |
| Wash | 4 | Adds 4 to Fault number | Adds 4 to Error number |
| Rinse | 2 | Adds 2 to Fault number | Adds 2 to Error number |
| Spin | 1 | Adds 1 to Fault number | Adds 1 to Error number |
| Done | Cycle complete | Steady indicator | Steady indicator |
Example: Reading F02 E01
- Phase 1 (Fault F): Sensing is ON. The Rinse light (2) illuminates = F2.
- Phase 2 (Error E): Sensing turns OFF. The Spin light (1) illuminates = E1.
- Result: Fault Code F02 E01 (Long Drain / Drain Pump Restriction).
How to Run the Automatic Recalibration Mode
If your washer has been stopping on “Sensing”, banging violently, or failing to balance loads, running the calibration cycle realigns the main control board with the tub suspension and optical tachometer.
The washer tub must be completely empty of all clothes, water, and detergent before starting calibration. Do NOT interrupt power or open the lid while calibration is running (takes 2 to 4 minutes).
- Enter Service Diagnostic Mode using the 1L-3R-1L-1R dial sequence.
- Turn the dial clockwise until ONLY the Rinse light is illuminated (all other status LEDs must be off).
- Press the START button.
- The lid will lock, and the washer will automatically cycle through motor agitation, drain pump activation, and spin acceleration.
- When the Done light illuminates and the lid unlocks, calibration is complete.
Connected Diagnostic Procedures & Next Steps
Entering Service Diagnostic Mode exposes exact fault codes across the entire Whirlpool & Maytag platform. Select your active diagnostic code to view the step-by-step physical fix:
Frequently Asked Questions
Why won’t my Whirlpool washer enter diagnostic mode?
The most common cause is incorrect cadence: the 6 turns must be completed within 6 seconds. If you pause longer than 0.5 seconds between clicks, the timer expires. Unplug the machine for 2 minutes to clear logic, reconnect, and try again with steady clicks.
How do I clear stored error codes after fixing the machine?
While viewing stored fault codes in Diagnostic Mode, press and hold the START / PAUSE button for 3 to 5 seconds. All status LEDs will turn off, confirming fault memory has been wiped.
Can diagnostic mode damage my washing machine?
No. Diagnostic mode is a read-only factory testing routine designed by Whirlpool engineers. It tests hardware components safely at low operating speeds.